Thursday, July 12, 2012

A + chocolate cupcake


I only took one semester of Home Ec. & it was in (I think?) 7th grade. It was a fun class, but the only thing I really remember was that what I called a spatula was actually called a rubber scraper. I mostly learned to cook & bake by watching my mom & lots of trial & error. I still consider myself a better cook than baker, since my cooking experiments seem to always turn out while my baking experiments are barely over a 60% success rate (even when I'm using someone else's recipe).

This cupcake is a game changer. After tasting it, I could picture myself winning Top Chef: Just Desserts... or at least getting an A+ in my Home Ec. class.

I have a suspicion that adding red food coloring would make this very similar to a red velvet cupcake, but I've never made red velvet cake so who knows what kind of crack they put in that stuff (disclaimer: there is no crack cocaine present in this recipe, only an added chocolate drizzle on top).

This is modified from Emma's basic chocolate cupcake recipe. She also does an A+ job with the recipes she posts. The only "complaint" I have is that the recipe states "makes 1 dozen" but I got 25 cupcakes out of it. It was horrible! :)

A+ Chocolate Cupcake (modified from here)
makes about 2 dozen

2 1/4 cups flour
1/4 cup cocoa
2 cups sugar
2 tsps baking soda
1/2 tsp salt
1/2 cup cold coffee
1 1/2 cups water
2/3 cups oil
2 Tbsp red wine vinegar

Preheat your oven to 350 degrees. Combine dry ingredients in a bowl. In another bowl, whisk together the wet ingredients. Slowly add the dry ingredients into the wet ingredients, mixing just until batter is no longer lumpy. Pour the batter into lined cupcake tins, filling each cup 3/4 of the way full. Turn the over down to 325 degrees & bake for 23-25 minutes.

Chocolate Drizzle
1 bar of Hershey's milk chocolate
2 Tbsp butter
approx. 3 Tbsp cream

Break up the chocolate bar & melt with the butter in a microwave safe dish (mine took about 50 secs to melt, but watch it closely!!). Mix well with a fork, then slowly add the cream 1 Tbsp at a time, mixing well in between. Use the fork to drizzle over cupcakes.

You know what? These cupcakes are vegan! I didn't want to lead with that cause it scares some people away (the chocolate drizzle, however, does contain dairy).


I made these yesterday, and I think they tasted even better today, out of the fridge. I'm surprised they even lasted that long.

Tuesday, July 10, 2012

prints to scratch the itch

As a latecomer to Pinterest, I went through a period when I was endlessly browsing boards I followed, boards I didn't follow, DIY boards, popular boards, boards about kids (I'm not a mother or pregnant), boards about weddings (I'm not getting married), boards about home projects (I'm not a homeowner)...and on from there. Things were getting out of control. Luckily, I have tamed my initial overwhelming need to see everything ever pinned and now exercise a healthy level of pinning. I like pinning style-related, home-related, recipe-related, and pretty-related things, but try to stay away from the other 30 categories advertised. I guess I'd rather be doing than pinning.

One thing I do find myself attracted to are pretty prints and posters that I can't necessarily buy or display, but like to let others know that I like them. So, in the middle of summer, when I really want to hop in the car and just drive for hours, or get the itch to just go somewhere that is not in the city, or long for a real vacation and not just days off, I can pin these images and remind myself that The Big Trip is about 6 weeks away, and I will definitely get my fill of day-long drives and new places.

on Pinterest, but no original source link
I have lived in the Midwest my whole life...living on the ocean sounds so exotic!

from here
My motto, perhaps.

again, no original link
Sometimes when I feel like I'll end up living in my car and never land a job in LA and will crash and burn when I leave my comfort zone of Chicago, I have to remind myself of this.

from here
Trust me, Fleetwood Mac is definitely on at least one of my road trip playlists.

from here
 Something important to remember as I try to donate/sell as much as I can before moving.

I'd love for you to follow me on Pinterest! (Also follow me by clicking the button on the sidebar). And I'd love to follow you to see what itches Pinterest helps you scratch...wait, let me rephrase that...

Monday, July 9, 2012

mango power smoothie


I love using my little Magic Bullet blender to make single-serving smoothies! And since my work schedule leaves me with a weird amount of time between lunch and dinner, having a smoothie that will fill me up but won't make me full (get the difference?) is pretty handy. I've been experimenting with adding kale to give my smoothies a nutritional boost, and this one I whipped up today was too delicious not to share. I prefer my smoothies on the thick, creamy side as opposed to an icier smoothie (I don't like using frozen fruit or ice cubes), so using frozen bananas (ok, I'm going back on what I said two seconds ago. Bananas are acceptable.) is a great way to get a creaminess without any dairy--did I mention this is vegan-friendly?

(Vegan) Mango Power Smoothie (makes 1 serving)
1 ripe mango, diced
1 banana, sliced then frozen
1/4 cup oatmeal, uncooked
1/2 cup loosely packed kale
1 Tbsp water

Put all ingredients into a blender and blend. Depending on the type of blender you have, you may need to experiment with the order you layer the ingredients--with the Magic Bullet, it works best for me to have the kale closest to the blade so it gets well-chopped and I'm not drinking big pieces of kale.


I love adding in all sorts of different ingredients and seeing what color the smoothie turns out to be--anyone else find this exciting? It's really cool, you guys.

This entire smoothie was gone before I even finished writing this post. Count that as a success.

Friday, July 6, 2012

DIY : felt flower crown


Since spring, I've been seeing so many flower crown DIYs on my favorite blogs; I knew I had to make my own. In my commitment to use the supplies I have instead of making a trip to the craft store for every DIY idea that comes my way, I decided to use some leftover felt scraps to make little felt flowers for my crown. I also used an old faux flower stem, so this project cost me zero dollars. Hooray!


You will need: scrap felt, glue gun, scissors, flower patterns (I found mine here), bendable flower stem large enough to make a ring around your head, pencil (not pictured)

Start by tracing your patterns on the felt. I made three different sizes. You don't have to trace them perfectly, I found it easy to cut out the pattern if at least the spiral was traced. Don't worry about making every petal perfect! Cut out the patterns (I also cut some simple leaves from my green felt). Wrap the stem around your head comfortably, then carefully remove it and glue together where the end joins the stem (I had some hangover that I let go past the end of the ring, but if you'd like you can snip that off).


Starting in the center of the pattern, roll up the flowers by spiraling the petals tightly together. Put a large X of glue on the back, or as much as you need to hold all of the petals securely in place. Wrap the rest of the flowers. I ended up making more flowers than pictured--I decided to make my crown asymmetrical and fuller on one side instead of a single ring around.


Attach the flowers to the stem with glue. To hold larger flowers in place, I wrapped the back petals around the stem. For smaller flowers, I simply glued them directly to the stem or to the sides of the flowers surrounding them (if they were in a cluster). Fill out your crown with the greenery.


And you have a lovely, hippy-ish flower crown that's perfect for a festival or BBQ. My brother told me I looked like I belonged at Night of a Thousand Stevies, which I took as the highest compliment. I'll definitely be wearing this in some Montana pics during our road trip.


Happy Friday & stay cool!

Wednesday, July 4, 2012

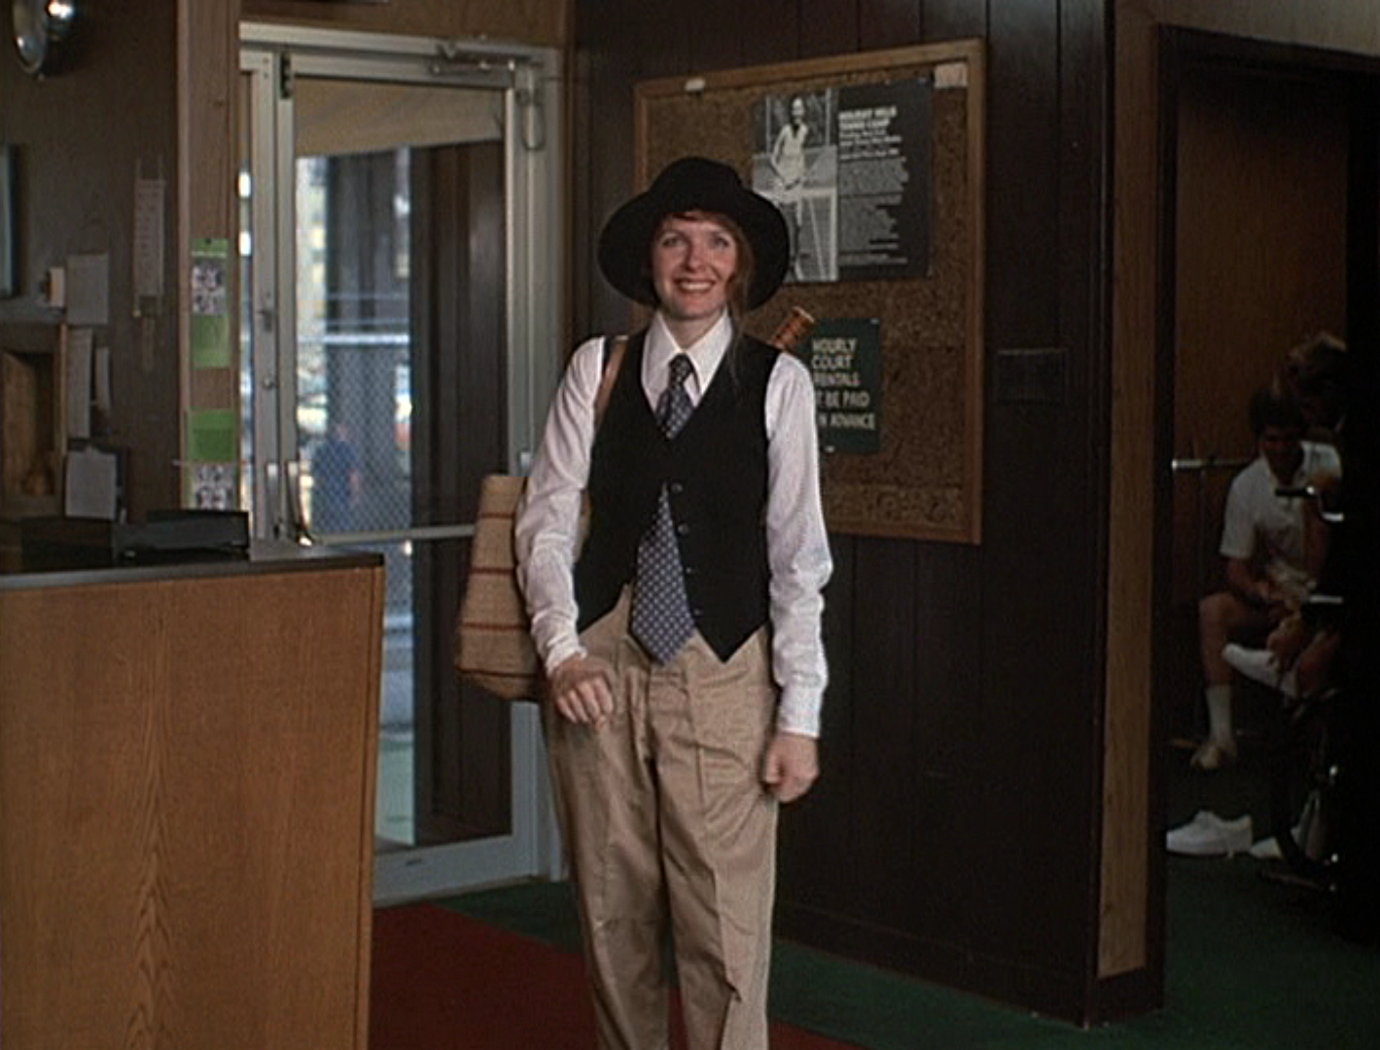
Inspired by: film's stylish american women

Happy 4th of July! To celebrate via this blog, I'm bringing you some stylish film characters that embody my favorite kind of all-American look. But don't expect poodle skirts and heels--these ladies are more of the ass-kicking variety.

from here
Louise (Susan Sarandan) & Thelma (Geena Davis), Thelma & Louise

from here
 Annie Hall (Diane Keaton), Annie Hall

from here
Toni (Jennifer Grey) & Erica (Lea Thompson), Red Dawn

from here
Stacy (Jennifer Jason Leigh) & Linda (Phoebe Cates), Fast Times at Ridgemont High

from here
 The Girl (Laurie Bird), Two-Lane Blackop

 I hope you're celebrating in style!